The post How To Prepare Dielines For Prepress & Printing first appeared on PakFactory Blog.
The post How To Prepare Dielines For Prepress & Printing appeared first on PakFactory Blog.
]]>When using custom packaging, the prepress printing process needs as much attention as the design. This process is vital in determining the overall look and feel of your packaging, so getting this part right and having a standard procedure in place is imperative.
One of the main processes you need to get right from the start is your box dieline. This is an essential process, as dielines ensure your designs are accurate and meet your expectations. They are a great place to start, especially if you are still in the planning phase of your packaging design.
So in this article, we’ll take you through the steps of correctly making dielines for prepress. But before we jump into our step-by-step guide, let’s take a moment to understand its definition.
Put simply, dielines are vector files and essentially the flat blueprint version of your finished packaging, which acts as a guide when making cuts, scores, and indentations in the die-cutting process to construct your packaging.
Knowing that dielines are the blueprint for your final package is enough to understand their importance, but if you would like to read more in detail about what is a dieline in packaging, we have an in-depth explanation here.
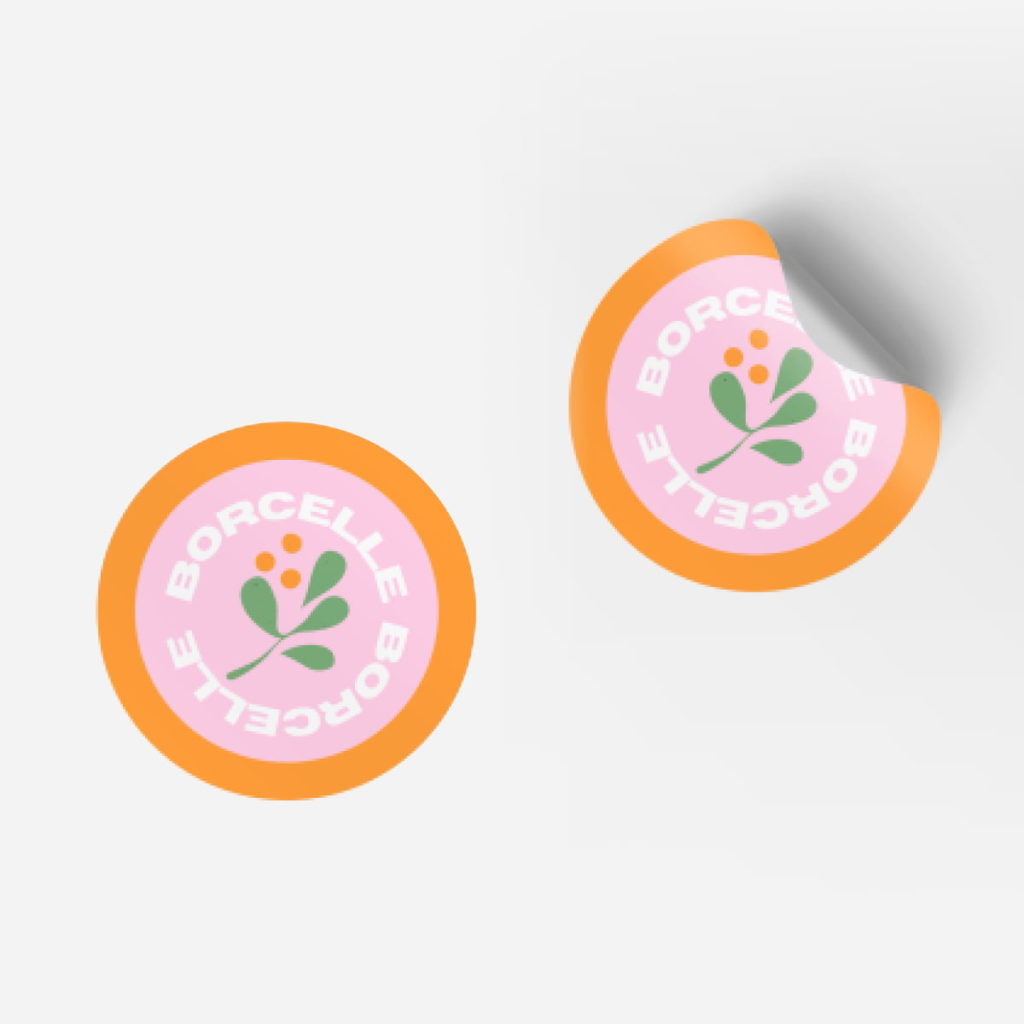
Source: PakFactory
But now that you have a better idea of what a dieline is, let’s dive into the step-by-step guide to preparing your dielines for prepress and print!
Before creating packaging dielines, there are a few essential things for you to consider.
The first thing you need to determine is how big you need the packaging for your product. Ideally, your packaging should be the minimum size your product needs to sit comfortably inside.
Dielines are usually printed on sheets that fit industry standards, so make sure you are not opting for astronomically large packaging sizes, as printers may not accommodate the larger sheets required for the die-cutting process on oversized projects.
The weight of your product also needs to be considered. Heavier products may require thicker stock like corrugated cardboard to hold and protect products adequately, which affects the type of dieline you require.
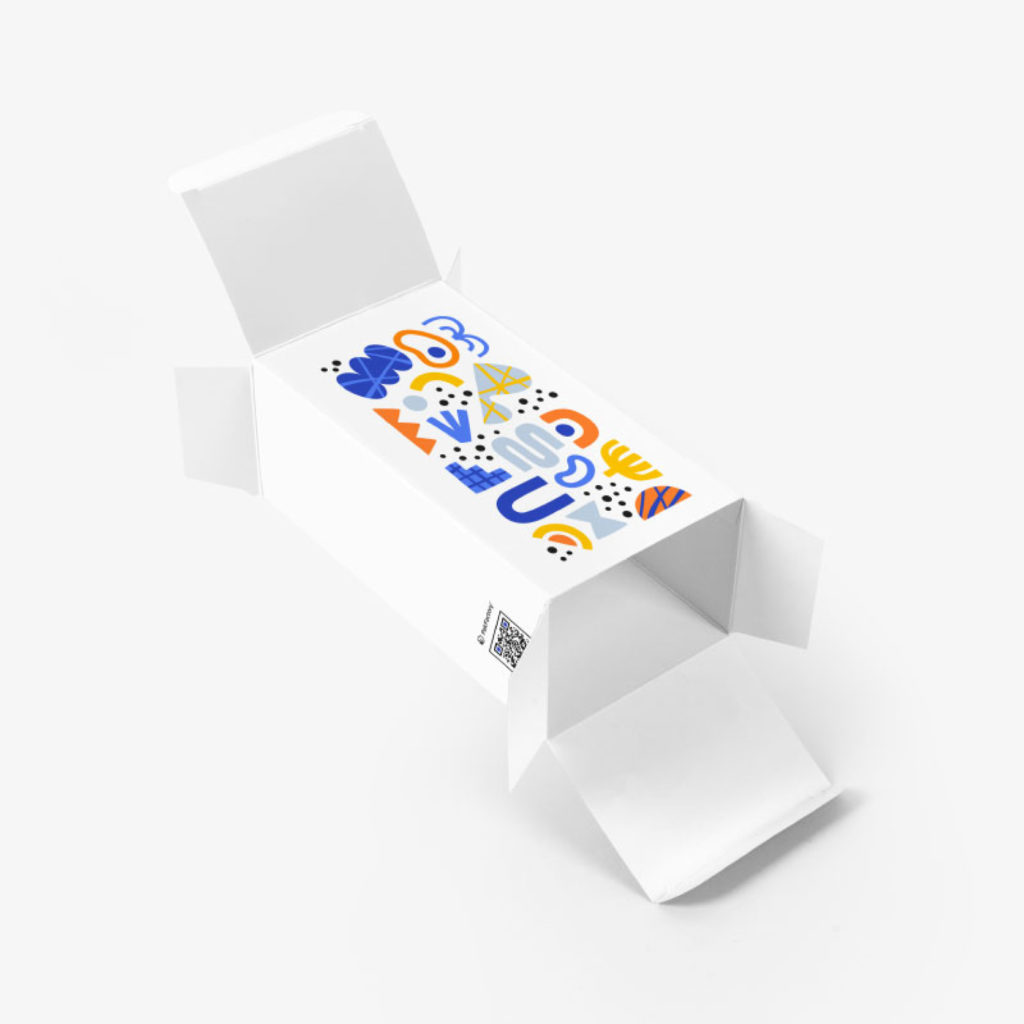
Finally, the purpose of your packaging needs consideration as it will affect how your box dieline will look. Are you an e-commerce business that relies on shipping your products? Or are you a retail business that needs to create a strong shelf impact in-store?
For example, e-commerce businesses will likely choose thicker card stock like corrugated paperboard to protect products in transit. As an e-commerce business, It’s important to consider how your packaging will arrive at your customers’ locations, so its dielines may include some additional flaps or tabs to account for extra cushioning when constructed.
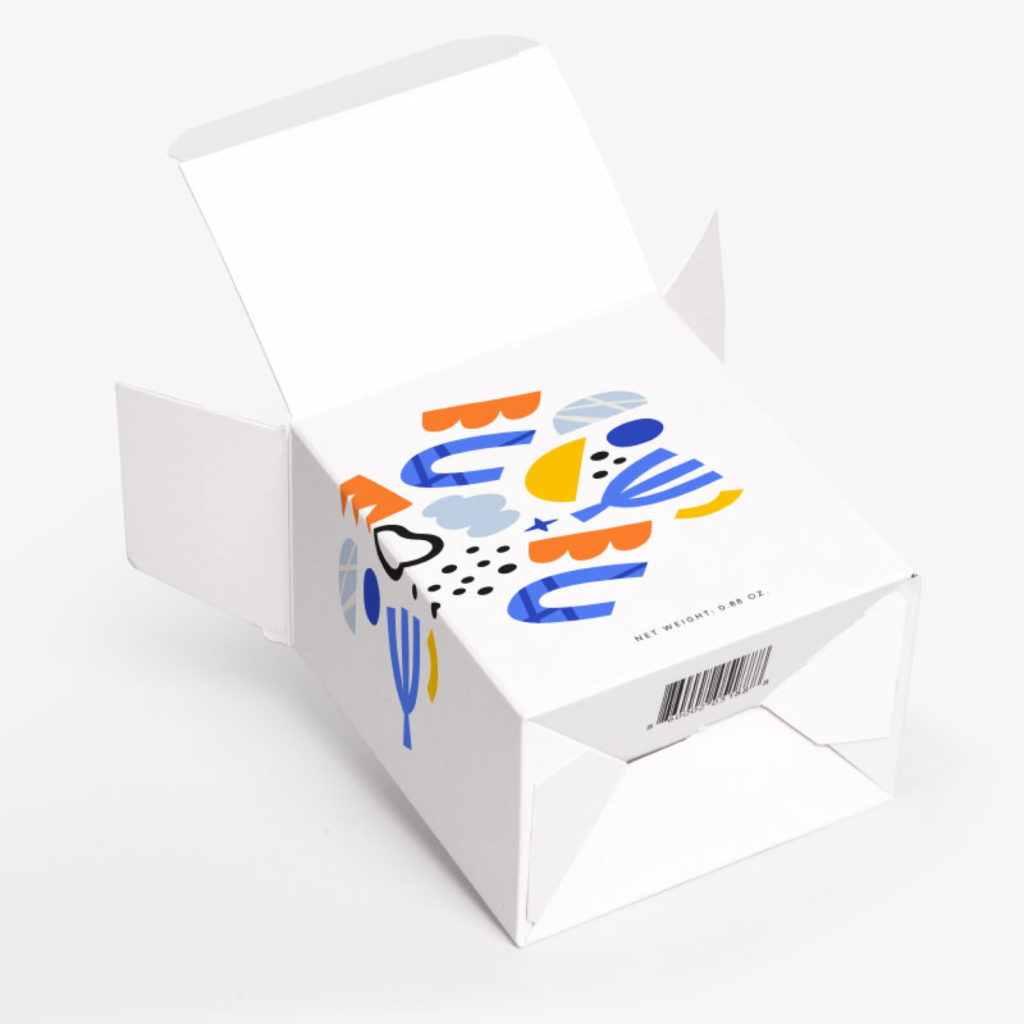
Source: PakFactory
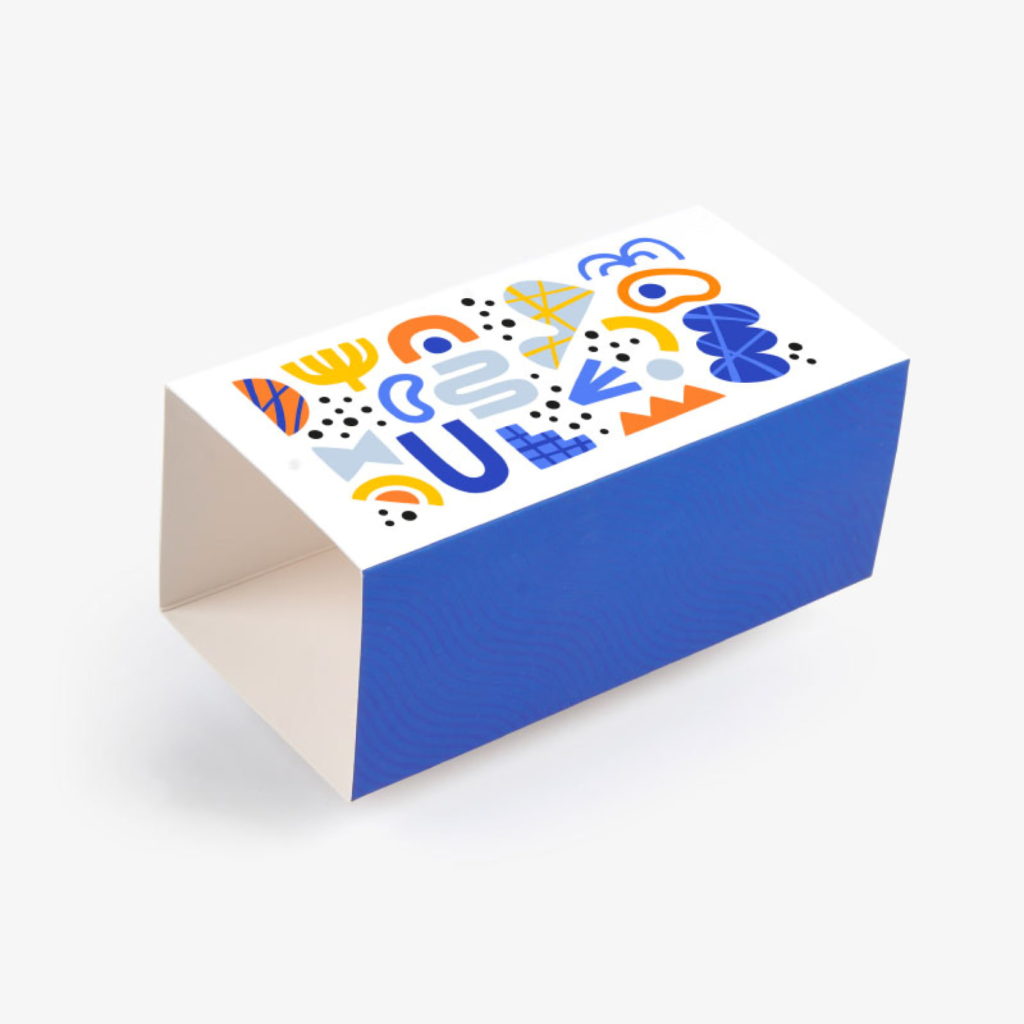
On the other hand, retail businesses are likely to choose folding cartons or rigid boxes for packaging lighter-weight products, meaning the dieline may feature fewer flaps and tabs.
Understanding how your packaging will serve your industry gives you a better idea of what to expect when making your dielines. But now that you have the details set, it’s time to translate that into a guide the printer and die-cutting machine can understand.
When creating a box dieline, many technical details must be kept in mind, making it challenging to understand. Custom packaging companies or manufacturers usually provide their own dieline templates to ensure the structural design of your packaging works when constructed. This way, all you have to do is position your artwork designs and ensure the colors match for printing.
To better understand how to do this, we’ve provided a free dieline template for your usage:
To place your artwork design onto the dieline, you’ll need Adobe Illustrator to open the file, which, as mentioned earlier, should be a vector file. The dieline will also feature several differently colored lines correlating to instructions for the die-cutting machine.
When placing and positioning your artwork designs, it’s essential to understand what these lines mean. Please remember that each company will have its standard for the colors mentioned, but the ones outlined are related to PakFactory’s standard for dielines. With that in mind, let’s look at what each color and line means.
Marked in black, cut lines are probably the most crucial part of your dieline. They communicate where to cut your dieline to construct your final packaging.
Crease or fold lines are usually marked in red and communicate where to fold your packaging. The red dotted lines ensure ease of construction for your packaging once complete.
Bleed lines are marked in green, separating excess space from the space that will ultimately feature your artwork design. Bleed lines help prevent any obscuring of your artwork and ensure your packaging design remains how you planned it on your vector file!
All artwork should ‘bleed’ over into the next panel or onto the excess space beyond the cutting lines to prevent a white border from forming around the design’s edge.
The safe zone is marked as a green dotted line and indicates to the printer which areas are guaranteed to be seen on your custom-printed boxes. Safe zones help printers with their alignment, ensure printed artwork is placed correctly on the finished project, and account for any stock movement during printing.
Your glue tabs will be shown as green crisscrosses to indicate where glue needs to be placed in the construction of your packaging. Do note that some packaging structures, like auto-lock bottom boxes, do not require a glue tab as they are designed to work without glue or tape.
We mentioned the prepress printing process before, and you might wonder, what is prepress?
Prepress involves all the printing processes and procedures between designing the print layout and the final print. So now that you have a good understanding of the lines mapped out on your blank dieline from the above section, it is time to start this prepress process!
The first step is determining precisely where your box’s top, bottom, sides, and interior is on your box dieline. It can be tricky to distinguish what parts of your packaging will show and which elements will be tucked away. Make sure you mark the sections of your packaging you want printing on before positioning or creating your artwork designs.
Artwork can be created directly on the dieline you’ve opened on Adobe Illustrator or transferred from another file, but follow the below prepress workflow to ensure the best accuracy and quality of your designs.
When submitting designs to PakFactory, we have provided a simple checklist to follow that will help you. But now that you’ve finished your dieline, it’s time to consider the printing method.
Read more on how to prepare your artwork on Adobe Illustrator.
As previously discussed, dielines are printed on large sheets of the material of your choice before being cut out and constructed. Linking back to the size of your packaging, opting for bigger sizes of your dieline may not be effective, as it may not hold its shape after construction, and printing may not be possible on sheets as large as you would need.
So, once again, it’s essential to consider the minimal size your product needs to comfortably sit inside the packaging so your dieline is at a reasonable size for printing.
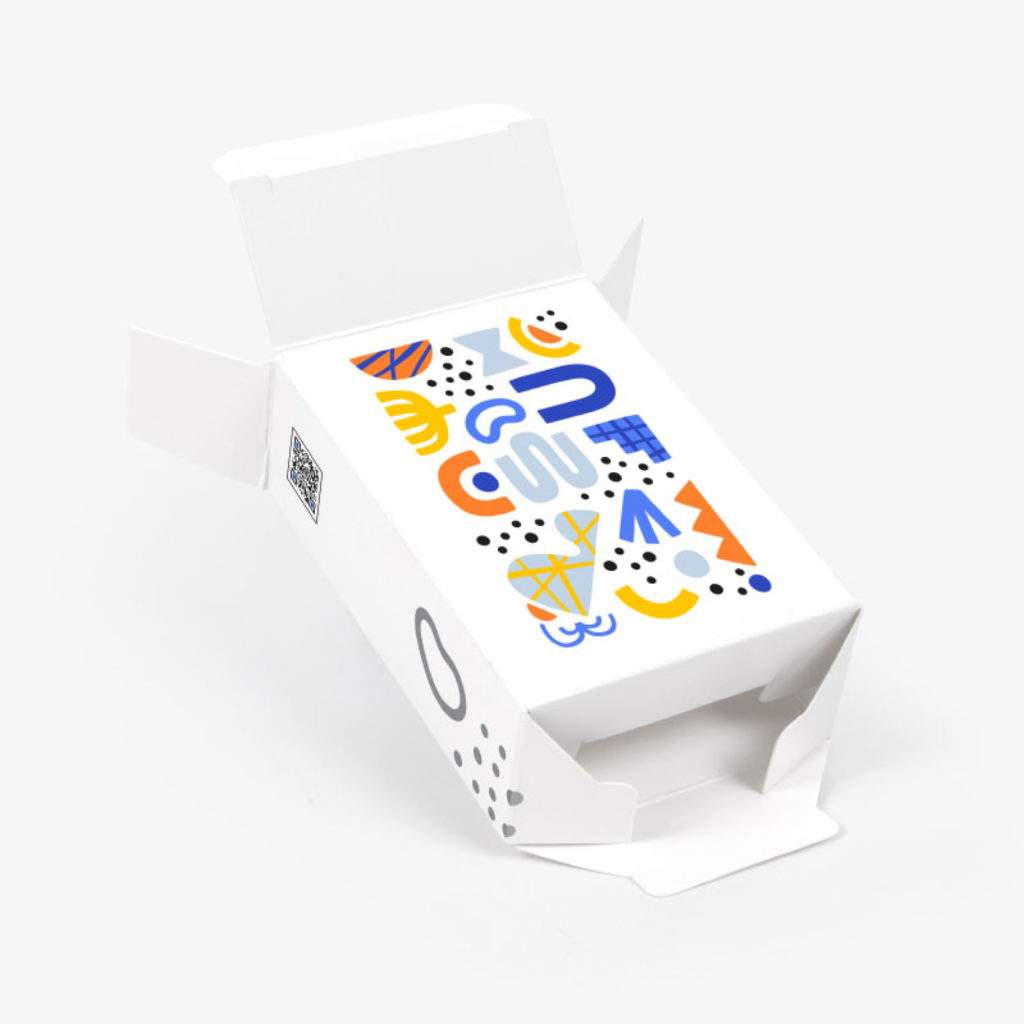
Source: PakFactory
Other things to consider are the vibrancy and complexity of your artwork designs. If your artwork designs are vibrant and complex, you’ll likely opt for offset printing to ensure the highest quality results. This is also important for designs that feature a lot of text, as it needs to be easily legible for customers.
Alternatively, for designs that are more minimalistic or don’t require exceptional clarity to be impactful, digital printing may be more suitable for your packaging design.
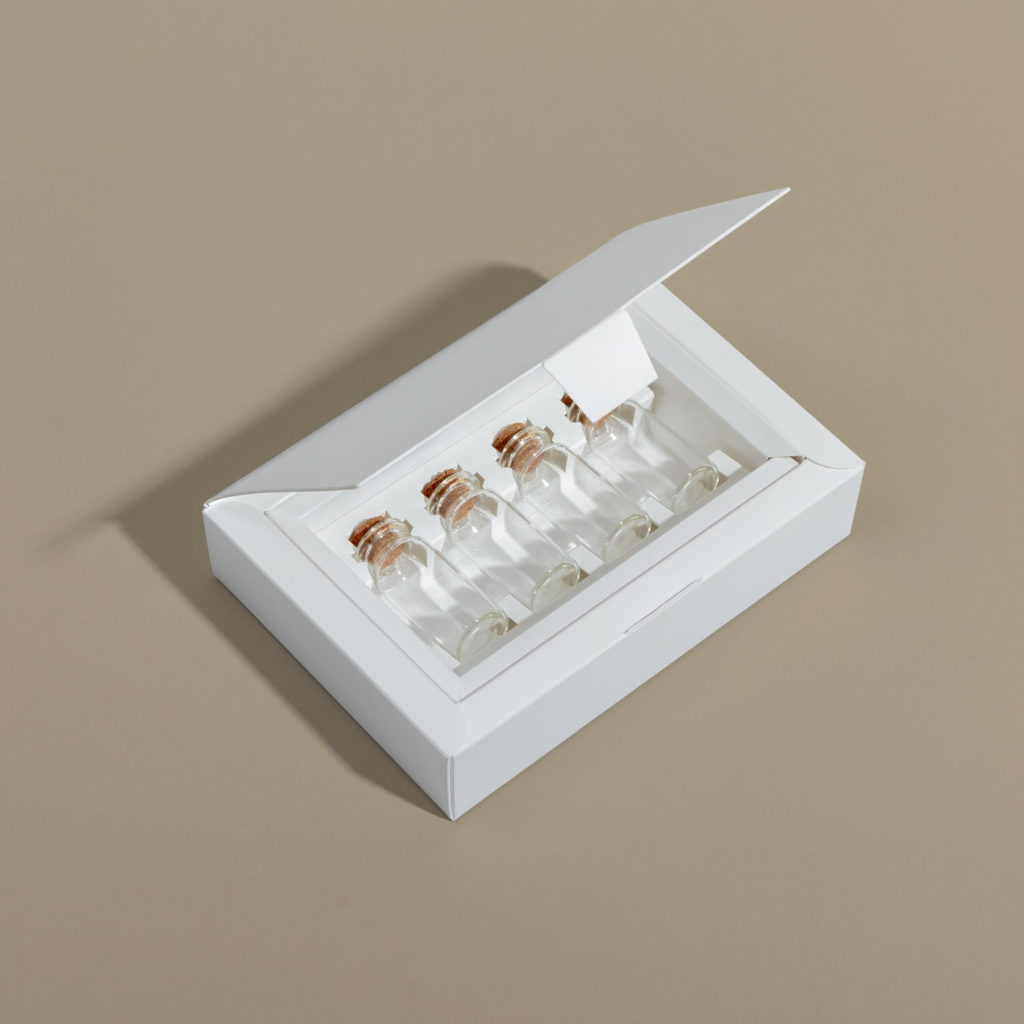
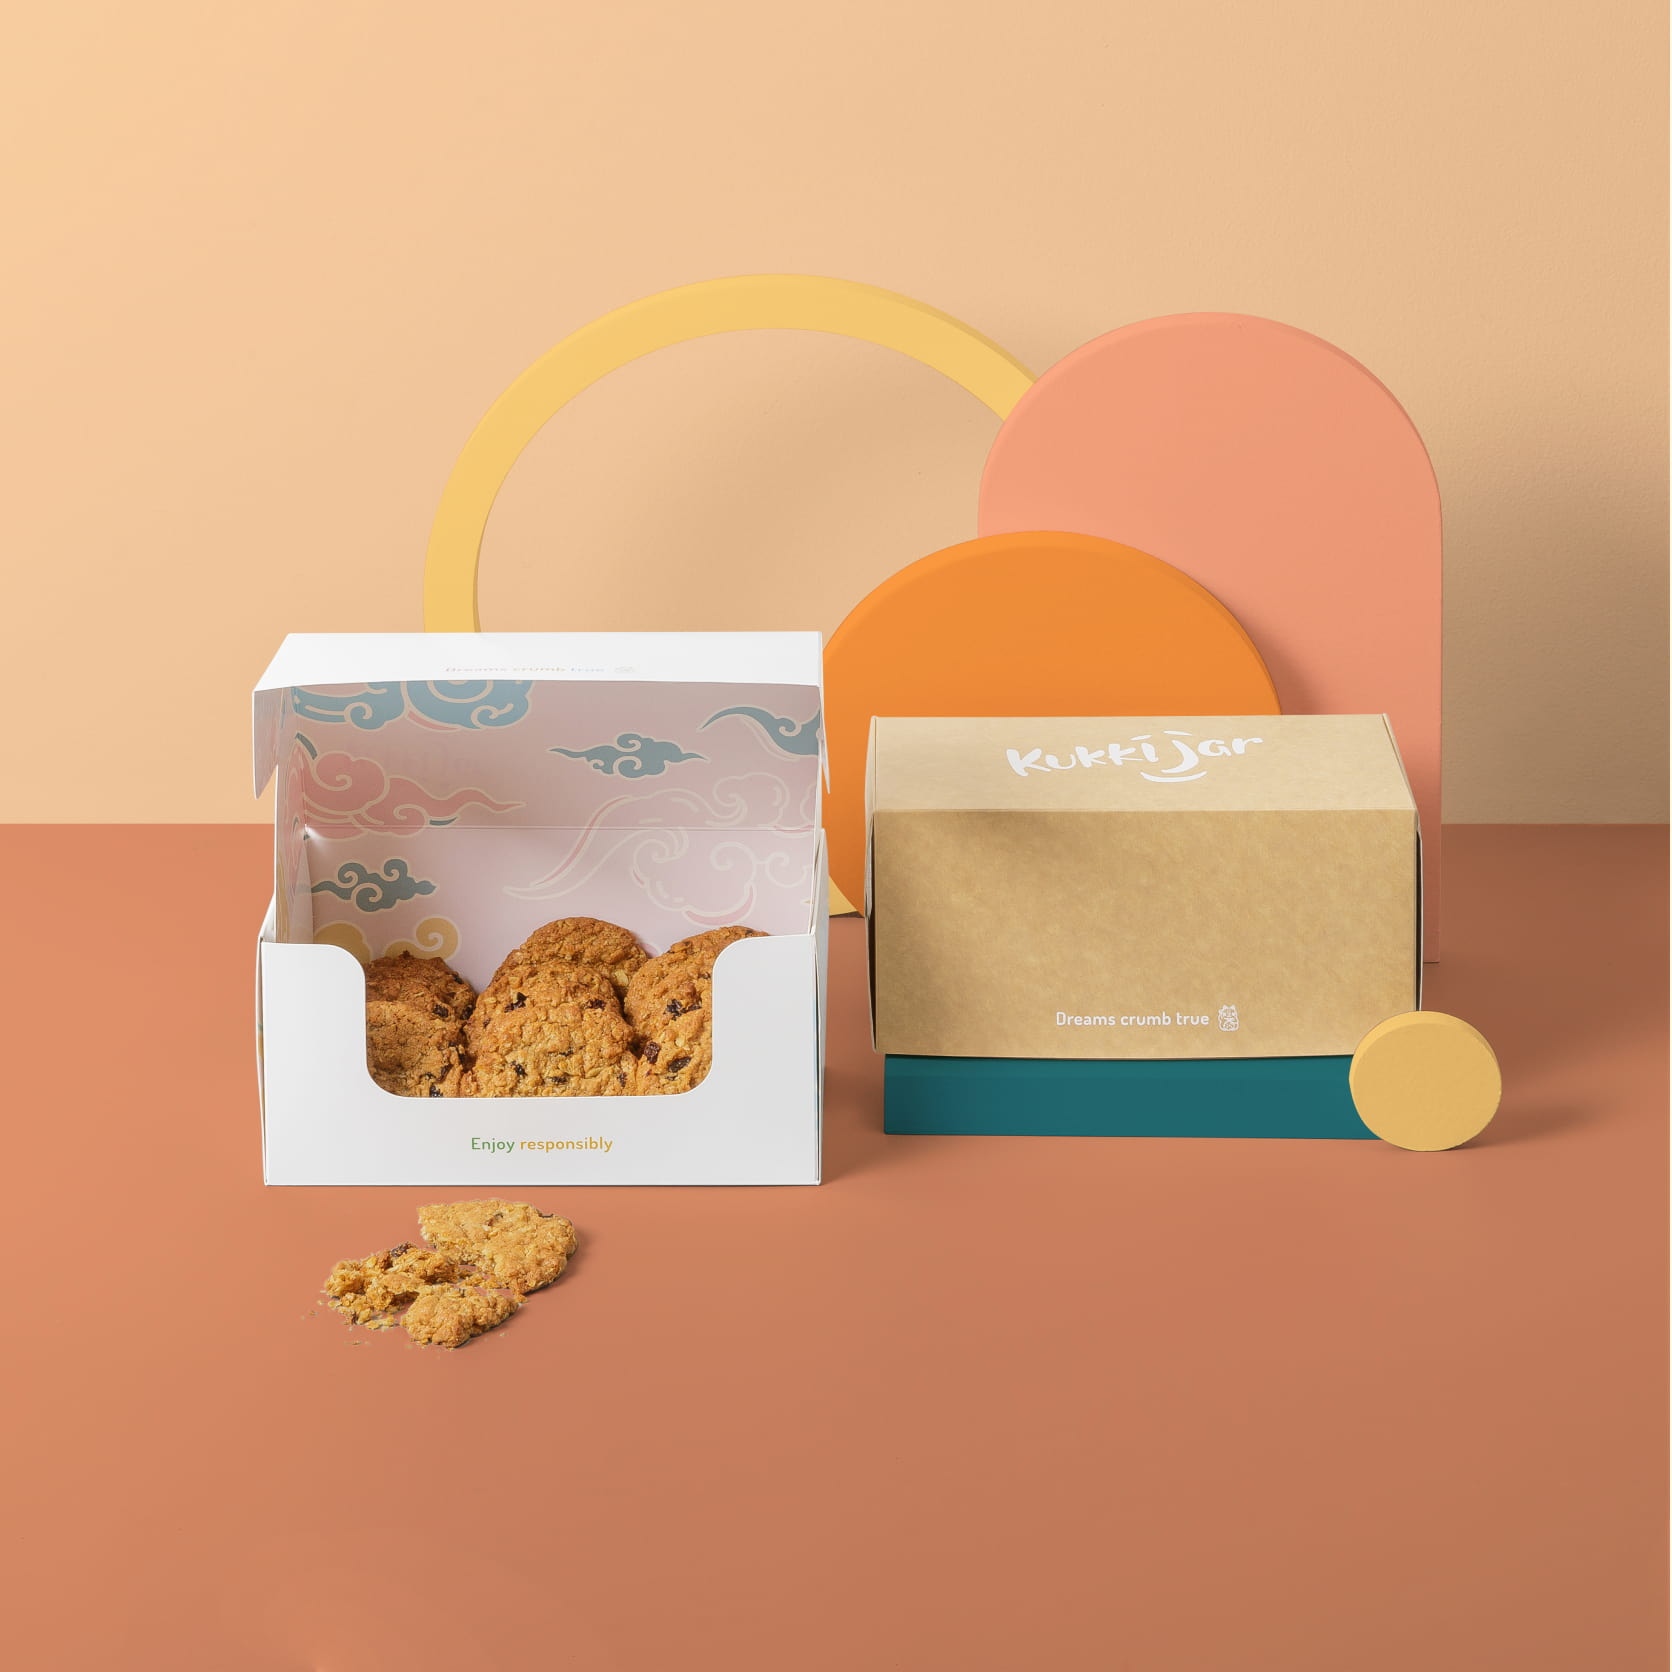
Once you finalize your packaging dieline design and choose your printing method, it’s pretty easy to feel 100% confident in your project and send it off for mass production. However, it’s essential to put your packaging through quality control checks to ensure it can withstand any conditions it may face before mass production.
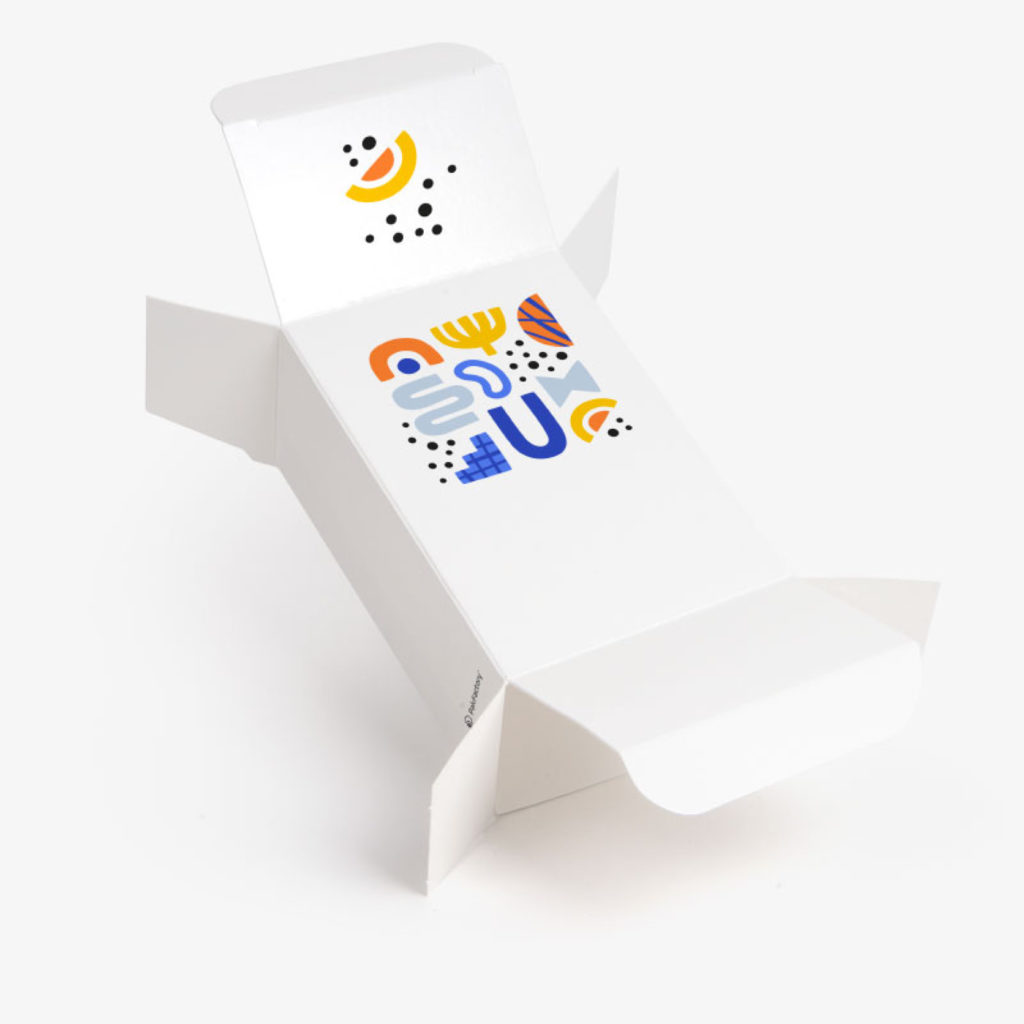
Source: PakFactory
Work with your manufacturer to prototype your final design before mass production. This way, your packaging designer or manufacturer can alter your box dieline depending on any structural issues it may have faced during the quality control process.
Ordering a sample of your finished design will allow you to physically interact with your packaging and reposition and fix any errors in artwork design or text that may appear on your final package. Read more on why ordering samples is important for your packaging.
But once you have approved your prototype samples and made any necessary changes, that’s it! Your packaging dieline is ready for mass printing and production.
Creating packaging dielines can be daunting, which is why packaging design and structural engineering services are helpful! PakFactory has a lot of experience working with different businesses across industries on their packaging designs, and dielines are no exception. Hopefully, we’ve made preparing a packaging dieline for your project more manageable with the above information and checklist.
However, if you have questions or want to continue your journey into custom packaging further, contact one of PakFactory’s product specialists today!
The post How To Prepare Dielines For Prepress & Printing first appeared on PakFactory Blog.
The post How To Prepare Dielines For Prepress & Printing appeared first on PakFactory Blog.
]]>The post Custom Decals, Stickers, and Labels – The Master Guide first appeared on PakFactory Blog.
The post Custom Decals, Stickers, and Labels – The Master Guide appeared first on PakFactory Blog.
]]>Decals, stickers, and labels may sound similar, but each option differs slightly. And though the difference may be slight in some cases, it can still affect which option is best for which scenario.
In this article, we will define these differences clearly and show you each option’s benefits and disadvantages. By the end, we hope to give you a better understanding of the difference between decals, stickers, and labels so that you can make a more informed decision the next time you use one of these options in your packaging project.
Now that you know each option differs from the other, what is a decal? What is a sticker? What makes them different? What are they best for? You might have many questions that now need answering, but let’s first focus on the basic definition of a sticker, label, and decal. A better understanding of each option will allow us to give a much more accurate answer to each preceding question.
To begin, let’s look at the sticker. Custom stickers are small pieces of paper, vinyl, or fabric with an adhesive backing. They are available in various colors, shapes, and designs, making them versatile for branding and decoration.
Source: PakFactory
Decals are similar in that they have a self-adhesive backing but are larger, more permanent, and often used for identification and branding. They are typically made from vinyl, are cut to a specific shape, and have clear backgrounds to blend in when applied to various surfaces.
Source: PakFactory
Finally, custom labels are also a self-adhesive option made from materials like paper, vinyl, and polyester, but their usage is neither for decoration nor identification. They are usually printed with text or images that contain information about a product, its content, or its usage.
Source: PakFactory
As you can see from the above definitions and images, stickers, labels, and decals are similar in that they are all meant to stick to surfaces. Still, their intended purposes are generally different, and these differences don’t end there, so let’s dive deeper.
We briefly mentioned the different intended purposes for each adhesive option, but they also differ in other aspects. Though there are definitely similarities between the materials used and the types, styles, and production processes, it is essential to note the differences too.
Below, we’ve provided a simple chart to showcase the main differences. However, we will also go more in-depth to give you a complete picture of why stickers, labels, and decals should be considered separate adhesive options.
First, let’s look at the materials. We also briefly mentioned materials in the definitions section, but we’ll look at this topic in more detail here.
Source: Unsplash
For stickers, various materials are possible, like glossy paper, matte, vinyl, or fabric. Stickers are the most versatile when choosing materials and have many options for different intended looks, durability, and costs. For example, paper stickers are the most affordable option but are less durable than vinyl stickers.
Source: Jason Leung
Decals, however, typically use vinyl materials, which are durable, weather-resistant, and highly customizable with colors and designs. This is necessary as decals are generally much larger and, depending on their usage, can be exposed to more weather elements than stickers.
Source: Natasha Kendall
Labels use similar materials to stickers but are usually thinner for easy mass application onto products. Common labeling materials include Biaxially-Oriented Polypropylene (BOPP), vinyl films, or paper. However, other materials like holographic or metallic are still possible, though rare.
Regarding design options, stickers, and labels are very similar. They come in various sizes and have many design possibilities to suit different needs ranging from small and round adhesives to large and rectangular or even full-color printed designs. Both options are also available as a die-cut (cut to the exact shape) or a kiss-cut (cutting the material and leaving the backing paper untrimmed).
Where the similarities end, however, are in their application and durability. Stickers are typically applied manually, whereas labels can be applied manually but are generally mass applied through a specialized machine. On top of this, stickers can last much longer than labels depending on the materials, as labels are produced much thinner to accommodate mass application.
Source: Олександр Луценко
Decals are slightly different. As the largest of the three options and typically exposed to more outdoor elements, they are also the most durable. But unlike stickers and labels, decals are only available die-cut but can be designed in various shapes and sizes to work on surfaces ranging from glass, walls, metal, or sidewalks.
Source: Jan
Furthermore, leaning to its more prominent design, applying decals requires manual precision to ensure proper application with no lingering air bubbles. Therefore, it is highly recommended to seek the aid of professionals so that your decal is applied correctly!
Now that you know the differences between stickers, decals, and labels, let’s examine the advantages and disadvantages to know which adhesive option works best for your next project. Below, we’ve compiled a list of the main pros and cons for each adhesive option:
With the benefits and disadvantages covered, you might still wonder when is the best time to use each option.
Stickers are best used to promote a brand. They are often included in product packaging to encourage customers to decorate their personal water bottles, notebooks, or laptops with your company’s branding. Stickers are also excellent for generating word-of-mouth and can even be sold as an individual product too!
Learn more on how to make and sell stickers online here!
Labels are used in many industries like food, retail, and pharmaceutical industries. They are meant to be put on the product or packaging itself and serve two purposes of brand identification and relaying important product information. Great product labels should attract attention while properly conveying product information to consumers, like expiration dates, ingredients, or usage instructions.
Finally, decals are for advertising a brand or displaying information. Because of their large and durable nature, decals are best utilized on signage, windows, walls, floors, large industrial equipment, or vehicles.
Decals, stickers, and labels may be similar in some ways, but there are enough differences to warrant considering them separate entities. Each adhesive option has its own benefits, disadvantages, and ideal usage scenarios, so using these terms interchangeably needs to be corrected.
Here at PakFactory, we have many options for custom stickers and labels. So if you have any more questions or would like help on your next design project, please contact one of our packaging specialists today!
The post Custom Decals, Stickers, and Labels – The Master Guide first appeared on PakFactory Blog.
The post Custom Decals, Stickers, and Labels – The Master Guide appeared first on PakFactory Blog.
]]>The post Affordable DIY Packaging Ideas For Your Small Business first appeared on PakFactory Blog.
The post Affordable DIY Packaging Ideas For Your Small Business appeared first on PakFactory Blog.
]]>Finding and producing quality products to sell could be daunting, especially if your budget is tight or if you’re in the early stages of building your business.
That is why it’s a great idea to utilize DIY packaging! Apart from the myriad of things you must carefully plan and consider, you must also find a way to set your business and products apart from competitors.
As a business owner, your priority is to ensure that your products solve your buyers’ problems and meet their needs without ripping them off. But equally important, you must also provide a satisfactory customer experience. How do you make people remember your brand, and how can you give that ‘wow factor’ every time they unbox your products? Remember, your package is the first impression for potential customers.
With just the right amount of creativity and determination, you can develop customized packaging designs that will make people want to return to your shop and purchase more products. So to do that, here is a list of excellent and affordable DIY packaging!
Source: PakFactory
DIY or homemade packaging is a perfect option for businesses looking to add a personal touch to their products while keeping costs low. By making your own packaging, you have the freedom to design something unique that truly reflects your brand and the nature of your product.
Additionally, DIY packaging allows for greater customization and personalization, which can help you stand out from competitors and create a memorable customer experience. It is a great way to add value to your product and create a strong brand identity without breaking the bank.
So what are some custom DIY packaging ideas your small business can benefit from? Let’s dive in and find out!
Source: Unsplash
Glitter is a great way to make ordinary boxes shiny and beautiful. This is especially effective for products such as earrings, necklaces and other accessories, as matching the bright colors of glitter with the jewelry inside the box is a great way to make your packaging pop.
On top of that, you can easily purchase ordinary boxes and glitters from department stores and begin the design process immediately. And because the materials for this packaging are accessible and cheap, you don’t need to worry too much about your budget.
Source: Rebecca Lee
Another excellent DIY idea is to invest in a custom stamp for less than $50. If you’re a seller of handcrafted products, boxes with custom-stamped prints of your logo can save you a lot of money, and it’s also an excellent type of packaging for brands with a minimalistic approach.
What’s even better about custom stamps is that they can be reused many times for any kind of packaging, be it a plain box for things like jewelry, paper bags for cookies and smaller items or canvas bags.
Source: PakFactory
Speaking of canvas bags, these are also excellent and affordable diy packaging for small businesses. They have a minimal environmental impact, are lightweight and are not chemically treated. Commonly used for packaging favors for events such as weddings, birthdays, and baby showers, canvas bags are great for small products like jewelry, handcrafted products, cosmetics, soaps, and tea.
To make canvas bags stand out even more, adding custom stamps onto the material with your brand’s logo can also create an even more custom experience for your customers. But what’s truly remarkable about this option is that your customers can reuse the bags!
Source: Dear Scrub
Aside from the design, customized stickers and tapes can be placed strategically to seal and tamper-proof boxes.
Stickers are easy to customize and can provide an extraordinary unboxing experience if designed and used correctly. Stickers are practical for inside and outside your package, making them a versatile DIY customization option that you can make at home or via a professional sticker manufacturer for an affordable price.
Custom tapes are a little more expensive, but if you have one with your logo printed across it, it can apply to any sized box you want and has a more significant ‘wow factor’ than stickers.
A great way to use custom stickers and tapes is alongside simple, plain boxes or food-safe treat bags for baked goods like cookies or candies. Dressing your bags with stickers and tapes is an excellent way to add customization without spending too much.
Source: Unsplash
If you’re feeling artsy, this option is one for you. Designing custom cards with unique illustrations or your brand logo is a stylish and flashy way to present your product. Especially for earrings, necklaces and other accessories, this affordable DIY option is for small businesses looking to stretch their creative muscles.
Source: PakFactory
Bubble mailers are a perfect option for businesses looking to ship larger or bulkier products. They are lightweight, easy to use, and offer a cost-effective solution for shipping products. Bubble mailers are designed with a layer of bubble wrap on the inside, providing a cushioning effect that helps protect your products from damage during transit.
Moreover, bubble mailers are easy to customize, making them an excellent option for businesses looking to add a personal touch to their packaging. You can easily add stickers, labels, tapes, or even print directly onto the mailer to showcase your brand’s logo, message, or design.
One of the best things about using bubble mailers is their versatility. They can be used to ship a wide range of products, including notebooks, shirts, books, gym clothes, and even automotive parts. The added protection the bubble wrap provides makes them an ideal choice for fragile or valuable items.
Additionally, using personalized or well-designed stickers and labels can enhance the overall look of your packaging. Even if you’re using ordinary bubble mailers, adding these touches can elevate the unboxing experience for customers and help create a memorable brand experience.
Source: Madeleine Steinbach
But if you want to make the entire package for your product yourself, a good and stylish option is to use renewable, natural resources like kraft paper, twine and adding dried botanicals for a more cutesy look. As a recurring theme in this article, you can even combine other DIY packaging ideas, like adding custom stickers and stamps to make your package pop out more from the competition.
Wrapping your product in kraft paper and twine lends itself well to handcrafted products, clothing, and smaller items.
Source: Unsplash
Alternatively, if you don’t wish to use kraft paper, beautiful fabrics that can be in a modern or vintage style are a good choice. Wrapping your products with a stylish velvety fabric gives them a unique, delicate look that is perfect for items ranging from clothing to handcrafted products.
We’ve covered many DIY packaging options for the exterior of your packaging, but what about the box’s interior? There are also many affordable options, some of which we have already mentioned above. Stickers, stamps, dried botanicals, glitter, all of these options can doubly serve as interior customization for your box!
But if you are looking for other ideas, we’ve got you covered. Crinkle paper is an excellent homemade packaging filler that can add another dimension to the unboxing experience. You only need a paper crinkle machine and a shredder to shred the paper into strips.
Source: BATCH by Wisconsin Hemp Scientific
Using the paper of your choice — we recommend a colored paper that compliments your package or product — you can fill your container with paper that adds texture and dimension to the interior of your box.
Source: Unsplash
Other DIY packaging ideas for your interior box include hand-written thank you notes to add a degree of personalization and connection with your consumers, postcards for a stylish flare, or even free samples to entice your customers to purchase more are all viable customization options for your package!
Creating effective and attractive DIY packaging is crucial in making your product stand out in a sea of competitors. Homemade packaging can be a fun and cost-effective way to add a personal touch to your product. But, to ensure that your packaging is successful, you should consider the following tips:
Source: PakFactory
Source: PakFactory
In summary, DIY packaging is not only a cost-effective way to add a personal touch to your product but also a way to build a stronger connection with your customer base, provide endless customization and flexibility, and support brand values like sustainability.
Utilizing these tips and ideas in your DIY packaging can create a memorable and effective packaging solution for your small business. So if you are ready to start, don’t hesitate to contact us!
The post Affordable DIY Packaging Ideas For Your Small Business first appeared on PakFactory Blog.
The post Affordable DIY Packaging Ideas For Your Small Business appeared first on PakFactory Blog.
]]>The post Why Cornstarch Packaging Is Beneficial To Your Business first appeared on PakFactory Blog.
The post Why Cornstarch Packaging Is Beneficial To Your Business appeared first on PakFactory Blog.
]]>Sustainability efforts continue to rise for all industries across the market. Businesses worldwide endeavor to make a concerted effort to meet sustainable consumer demands while maintaining high-quality product packaging.
The restaurant industry, in particular, has seen an enormous influx of sustainable packaging options. From biodegradable to recyclable packaging, the restaurant industry is taking significant steps toward eco-friendly solutions.
In this article, we’ll dive deeper into the most popular biodegradable packaging option, cornstarch packaging. If you haven’t already made the switch, we’ll lay out everything you need to know to take the leap toward more sustainable efforts in your packaging!
Source: PakFactory
Cornstarch is a biodegradable packaging material that can replace polystyrene (Styrofoam) and plastic. Available in transparent and opaque materials, cornstarch can be used in various ways, but the most popular way to utilize cornstarch packaging is for takeaway food.
This includes packaging options such as;
Unlike petroleum-based plastic, cornstarch containers are biodegradable and renewable, making them an excellent choice for eco-friendly packaging material and plastic alternatives.
Cornstarch is part of a more significant movement of emerging bioplastics derived from agricultural waste or byproducts. More companies are starting to create their own environmentally safe alternatives to plastics using various renewable resources like vegetables, oil, fats, recycled food wastes, and, you guessed it, cornstarch.
Cornstarch containers use polylactic acid (PLA) plastic made by fermenting the plant sugar and starch. Compared to traditional plastics, PLA plastic is much more environmentally friendly and sustainable as it releases fewer greenhouse gases during production and does not include toxic materials.
Not only is PLA plastic better in production and the exclusion of toxic materials, but when disposed of correctly, it can serve as fertilizer and only takes several months to break down instead of the hundreds of years traditional plastics take.
There are even an array of PLA plastic types or grades to choose from, including;
On top of being more environmentally friendly, cornstarch packaging is very cost competitive to traditional plastics, using the cheapest commercially available sugars, so there is no need to worry about exorbitantly higher costs, overuse and limited supplies. Moreover, the FDA has also approved PLA for use as a polymer, and it is regarded as 100% food safe.
We briefly touched upon the lifecycle of cornstarch packaging in our previous section, but it is worth going into more detail about why this material is so much better than traditional plastics.
For starters, at the beginning of this package’s lifecycle, it is derived from renewable resources, unlike petroleum-based plastic. And in the processing and manufacturing phase of its lifecycle, cornstarch plastic emits fewer greenhouse gasses than traditional plastic.
Once this eco-packaging reaches the consumer, it is used like any other product before moving into the end phase of its lifecycle, disposal.
The main characteristic of biodegradable cornstarch packaging is that it naturally degrades or can serve as fertilizer, leaving behind no negative environmental concerns or hazardous gases. Within months, cornstarch plastic can break down into just carbon dioxide and water, further helping to reduce the carbon footprint of both consumers and businesses.
But is it worth investing in? The short answer is yes.
Because of the exponential growth in the environmentally friendly movement, starch packaging materials and other bioplastics are quickly gaining market share. According to Globe News Wire, the biodegradable cornstarch packaging market will reach USD 126.85 billion by 2026.
Bio-based materials have many environmental benefits over time, and being renewable can make them an even better alternative to less eco-friendly options. As more companies pledge to change for a healthier planet, identifying and scaling sustainable packaging options is crucial to product and business success.
But what exactly are the benefits of cornstarch packaging for your business?
Using biodegradable packaging material offers companies many benefits, especially as a replacement for conventional plastics. Looking back at the lifecycle of cornstarch containers, we can already see the benefits to businesses and the environment.
The main advantage of using cornstarch packaging is that it is renewable since corn is affordable and readily available. Unlike petroleum-based plastic, there is no scarcity of resources, making it easier to utilize this kind of packaging material effectively and for the long term.
Starch packaging materials are also 100% biodegradable, recyclable and compostable, making them great for an eco-friendly initiative.
On top of this, no harmful toxins are present in the material, making it much safer to produce and use for consumers. Cornstarch is effective as food packaging since it is 100% food-safe, has a high aroma barrier, and is resistant to food fat and oils without additional coatings or chemicals.
Source: PakFactory
Furthermore, cornstarch packaging has low flammability and works well for printing applications, allowing businesses to brand their packaging without causing harm to the environment and offer a high-quality customer experience.
But while these cornstarch benefits seem significant enough to make the change, it’s still essential to cover both sides of the coin. Let’s examine the drawbacks to ensure you are well-informed about your decision.
Firstly, because cornstarch is so new as a packaging material, infrastructure is not in place yet to fully support it. While this will improve over time, using cornstarch as a packaging material currently poses some challenges. Though the polymers in cornstarch packaging are indeed eco-friendly and compostable, only a few facilities can now accommodate them.
This type of packaging also relies on customer behaviors. Because most customers will not compost the material properly, most cornstarch packaging will likely end up in landfills due to improper disposal. In addition, composting PLA plastic in large quantities could cause other issues, as doing so may make regular compost more acidic, posing a threat to the environmental impact.
The only way to combat these issues is by raising awareness about this packaging material and the proper disposal process to prevent more packaging from ending up in landfills.
Despite its drawbacks, cornstarch containers are still much more eco-friendly than plastic. So now that you’ve seen all the benefits and disadvantages of this eco-friendly alternative, you might still wonder, is it worth switching to this biodegradable packaging?
Yes! Cornstarch packaging material can significantly benefit your business and the environment, making this packaging solution worthwhile. It can help your business become more socially responsible and attract eco-conscious shoppers focused on supporting eco-friendly businesses.
Source: Chris Martinie
Consumers have become much more conscious of greenwashed packaging and are much more knowledgeable about materials in the industry. Using cornstarch is an excellent start to help market your brand effectively and establish a more authentic connection with customers.
With impending bans on single-use plastics looming, switching to more sustainable options is fast becoming a necessity rather than a choice.
Even so, using more environmentally friendly and innovative options such as cornstarch packaging materials or other biodegradable options helps you stand out and highlights your commitment to an increasing push for sustainability.
As we continue to learn more about the fate of plastics, exploring biodegradable and sustainable packaging materials is vital to stand out as a brand in the long run.
Were you looking to learn more about your sustainable packaging options? Get in contact with our product specialists to discuss your options today!
The post Why Cornstarch Packaging Is Beneficial To Your Business first appeared on PakFactory Blog.
The post Why Cornstarch Packaging Is Beneficial To Your Business appeared first on PakFactory Blog.
]]>The post Why Unboxing Videos Are Great for Your Business first appeared on PakFactory Blog.
The post Why Unboxing Videos Are Great for Your Business appeared first on PakFactory Blog.
]]>For the past decade, unboxing videos on social media platforms have snowballed. People can’t help but immerse themselves in watching these highly engaging videos for entertainment and educational purposes.
Today, many content creators and everyday consumers create genuine unboxing videos and product reviews on social media platforms like Youtube as a form of income. But how did this phenomenon become so crucial in affecting a customer’s purchase decisions? To get that answer, we must first ask ourselves: what is an unboxing video?
Source: Christian Wiediger
Unboxing or unpacking is an internet phenomenon of capturing the opening process of products through photos or videos. These products can be anything from anywhere, but the most popular industries that currently benefit the most from these videos are:
In fact, a study done by Google showed 1 in 5 consumers had watched an unboxing video, and 62% of these people do so when researching a particular product. The statistics don’t lie when revealing that unboxing videos have become more than just a trend but a growing phenomenon, with millions of views and thousands of videos uploaded yearly.
Don’t believe us? Below are some popular unboxing and review channels with relevant metrics retrieved from SocialBlade and one of the best unboxing videos on each channel. And though these videos are a few years old, these influencers still consistently receive millions of views for each new video they upload!
Unbox Therapy with 19.5 million subscribers and over 4.5 billion video views.
Marques Brownlee with 16.9 million subscribers and over 3.5 billion video views.
iJustine with 7 million subscribers and over 1.4 billion video views.
Why are we so intrigued by these videos that continue to capture hours of our attention? What makes these unpacking videos and reviews such great content to watch?
Source: PakFactory
Firstly, it’s our inherent curiosity. The build-up of excitement for a new product drives the popularity of unboxing videos. Consumers always look forward to the next best things, like new technologies, designs, and other products and want to know whether or not the latest things will be worth their money. This curiosity and anticipation build up to the next reason.
The big reveal, or the unboxing experience, allows brands to show off all their hard work. Think of all the time and money spent on developing the product, designing the packaging, strategizing the marketing campaigns, and more. All of that bears fruit during the unboxing experience.
Finally, there’s nothing like seeing authentic reviews and reactions toward a product. The content creators reviewing the products have already established a strong trust with their online community, so It’s a massive advantage if influencers have nothing but great things to say about your brand because their viewers will remember this.
When searching for a new smartphone or restaurant to try out, it is much easier to learn through other people’s experiences by reading or watching reviews online.
So now that you know what unboxing videos are and how popular they can be with consumers, how do they benefit a business? Let’s take a look.
Source: Sonhab Chocolate by PakFactory
YouTube has over 2.5 billion active users worldwide each month, with 62% of internet users in the U.S. accessing the website daily.
Creating an unboxing video or working with influencers and content creators will generate brand awareness. Each video can reach hundreds, thousands, or even millions of viewers daily. The beauty of the digital atmosphere is that anyone from anywhere in the world can access these videos instantly, giving your brand massive reach!
So if viewers see other people or their favorite influencer enjoying your product, it increases their chances of purchasing it too, hence why affiliate marketing is a huge revenue driver for these influencers! Their reviews help to validate the viewer’s decision-making process before finalizing purchases, especially for high-end products, while also benefiting the content creator in a win-win scenario.
Source: PakFactory
When you take the time to invest in creating the ultimate unboxing experience, it develops and strengthens the consumer relationship. If someone receives positive feedback about your product through an unboxing video, it will automatically intrigue them. Aside from wanting to get their hands on your fantastic product, they want to experience the same unpacking phenomenon that their favorite content creators feel.
Source: Freepik
By exceeding consumer expectations and keeping them connected, you deliver a good impression that will go a long way. A good impression embeds a positive mark on someone’s attitude towards your brand and products, motivating them to share with their friends, family, and online community. If you really enjoy a product, wouldn’t you want to share it too?
Source: Nathan Dumlao
After developing brand loyalty through unboxing videos, it encourages consumers to repurchase from you again. It works like a domino effect because your brand exposure grows as the content creator grows, and interest in your other products will soon come with it.
You may not realize it, but your brand and content creators work together to drive business for one another. Viewers can become your customers, just like customers can become influencers’ viewers. Again, it’s a win-win scenario for businesses, content creators and customers.
Source: Redd F
Finally, unboxing videos make it easy for your brand to receive constructive feedback without paying for surveys, research studies, or study groups. It’s essentially free information with two different types of feedback coming from an unboxing video:
Regardless of the reception, any feedback is good feedback. It will help you determine if you’ve done your job correctly.
Now that you know the sheer popularity of unboxing videos and how they are a mutually beneficial avenue of growth for business brands and content creators, are you ready to up the WOW factor for your packaging?
Source: PakFactory
If you’re ready to take your business to the next level by creating a fantastic custom box, speak to a product specialist about bringing your vision to life. Who knows, your product packaging could end up in the next viral unboxing video!
The post Why Unboxing Videos Are Great for Your Business first appeared on PakFactory Blog.
The post Why Unboxing Videos Are Great for Your Business appeared first on PakFactory Blog.
]]>The post How to Make and Sell Stickers Online in 5 Easy Steps first appeared on PakFactory Blog.
The post How to Make and Sell Stickers Online in 5 Easy Steps appeared first on PakFactory Blog.
]]>If you’re looking for an affordable, fun and creative way to showcase the personality of your budding business or an indie artist looking to begin selling something online, designing a sticker is an excellent avenue for you! According to eRank, which tracks trending products on the giant e-commerce marketplace, Etsy, stickers were one of the most searched terms on the website, showcasing this demand.
Source: Unsplash
Custom stickers are so versatile, with their ability to stick on any surface like a laptop, notebook or phone case and their ability to adopt any genre or style. The only limitation is your creativity and imagination, so in this article, we will go over five easy steps to start selling your DIY stickers online!
Before we get into the steps of how to make your own sticker, it is essential to know what a custom sticker is. Now, you might think a sticker is a sticker; you peel it and put it on a surface and done! Though you are not wrong in this sense, there is more to it than that.
A custom sticker is an individually cut piece of adhesive paper or plastic that can have up to five moddable layers manufactured to fit your needs. These layers include:
As mentioned earlier, stickers are so versatile, and there is a big market for them online. Whether it’s your illustration or photograph, anything can become a custom sticker to sell online. You can even have different sizes, shapes and unique finishes that work better for various items and audiences.
Source: PakFactory
With the limitless possibilities for creativity, stickers can fit into any style or genre you want, and finding a consumer base that enjoys your particular style isn’t a challenging task. Even from a business cost perspective, making stickers in small orders or larger batches can cost less than $1, and shipping isn’t very costly either, with a rigid envelope the only thing you need.
So if the above facts convinced you to start your voyage into selling your stickers online, let’s cut to the chase and get into how you can quickly get started!
Designing and selling stickers online is relatively straightforward, but like all good things, you still need to overcome a few challenges. The most challenging part regarding DIY stickers comes at the beginning of the five steps.
1. Designing Your Sticker
Finding a unique aesthetic can take time and effort. We suggest tapping into your hobbies, interests, artistic styles that inspire you, or symbols that represent your business or personality when creating a design.
Source: Unsplash
Once you’ve found that, you can design your stickers to match those inspirations, and we suggest that any design you create be done via the CMYK color system, as this is the standard for print materials.
Learn more about CMYK here.
2. Select a Printing Method
When choosing how to print your stickers, you have two options: print at home or have the professionals do it for you.
3. Where to Sell
Once you’ve completed your sticker design at home or through a professional printing company, it’s time to decide where to sell your products online. Thankfully, there are plenty of options.
Etsy requires making, shipping and managing orders on your own while providing very little customization for your storefront. Each new product comes with a recurring $0.20 listing fee and a 5% commission for each transaction. However, Etsy is simple to set up, and a considerable audience uses this platform, making it an excellent way to get your brand out there.
For Redbubble, selling is easier as you don’t need to make or ship the products. Redbubble allows you to upload your artwork stickers for free and they will handle the production and fulfillment. However, when a customer buys an item, you will need to pay for the manufacturing and shipping costs, which results in a lower profit margin.
With Shopify, you can customize your online storefront with branding, designs and promotions. A monthly fee is required to keep your shop running. But the challenge is that you will need to promote the store via social media, online influencers or email marketing. Do note that many online sellers utilize multiple platforms to diversify and extend their range.
4. Pricing Your Sticker Design
Once you’ve decided where to sell your stickers, how do you calculate pricing? When you’ve put a lot of time and effort into designing the perfect sticker, deciding on a fair price can seem complicated. The best way to determine a reasonable price is to look at your competitors.
Most stickers online will sell between $2-6, but factors like size, materials used (like holographic paper), and design complexity should be considered. Ideally, you need to make a small profit, so calculate the time spent and materials used to create your sticker when deciding upon a fair price.
5. Shipping Your DIY Stickers
The final step is to send your stickers! We mentioned Redbubble handles this, but if you are using other options, you must consider the best way to get your stickers to customers. Thankfully, shipping stickers is a breeze! You only need a stamp and a rigid mailer to protect your stickers from damage.
But if you wish to get a bit extra fancy to distinguish yourself from competitors, online sticker shops are known to create fun packaging to accompany their stickers. Consider handwritten thank-you cards, branded stickers or other custom inserts for extra flare.
Source: Unsplash
First, you must decide on the type of sticker you want to make before you can look into posting them online. For this, there are two main cuts for stickers: die-cut and kiss-cut.
Die-cut stickers conform to the exact shape of a sticker. This can be as simple as a circle or as intricate as the shape of a leaf on a tree. With this method, the sticker and the backing paper are cut to the shape of the actual sticker.
Kiss-cut stickers are when the cut is made only on the sticker layer. When the sticker is removed, the backing paper remains, allowing for sheets of stickers with multiple designs.
Alongside the different cuts you can have for your sticker design, stickers can also have different looks and feel depending on what they are printed on. Matte, for example, may highlight finer details, while holographic may make work better with bolder designs. Below are some popular choices:
We recommend experimenting with different finishes to find the best one that suits your sticker design.
Making sticker designs are a great way to showcase your creativity, personality and artistry while being an excellent product to sell online. Stickers are versatile for all industries, genres and styles and work not only for indie artists and small businesses but for larger businesses too.
So if you want to begin making custom stickers to sell online, look no further than PakFactory. To start your journey today, speak with one of our professional packaging specialists for more information on custom stickers and labels!
The post How to Make and Sell Stickers Online in 5 Easy Steps first appeared on PakFactory Blog.
The post How to Make and Sell Stickers Online in 5 Easy Steps appeared first on PakFactory Blog.
]]>The post What is CMYK for Printing? first appeared on PakFactory Blog.
The post What is CMYK for Printing? appeared first on PakFactory Blog.
]]>If you’ve ever had a project designed or printed before on a commercial scale, you’ve probably heard of CMYK. Alone, these four letters don’t give much of a hint as to what they are and what they’re for, but knowing this is important for any print job you do.
For starters, you should know that CMYK is an acronym.
Source: PakFactory
CMYK is a color model that stands for Cyan, Magenta, Yellow, and Key (Black). It refers to the four primary colors of pigment used in four-color process printing and is the industry standard for all print-related mediums like brochures, documents, and packaging.
Source: PakFactory
The CMYK color model also refers to the entire color printing process, where every image is separated into the four primary color pigments of cyan, magenta, yellow and key (black) to create a combination of colors with a fraction of the ink.
Now, you may wonder why we use ‘K’ or Key when referring to black. Well, there are two main reasons for this. The first reason is that Johann Gutenberg, the printing press inventor, was also the first person to use key when referring to black, which has since carried on to the modern day.
The second reason is that ‘B’ denotes Blue in the RGB color system. RGB is different from CMYK and stands for Red, Green, and Blue and is a commonly used digital color space for screens.
With the introduction of another color system, it is essential to discuss their differences so you know which color system to use for which purpose. We’ve already mentioned RGB, but to get a complete picture, we will also include Pantone (PMS) in the comparison, as this is another standard color system you may encounter.
Let’s look at all the main features each color system brings to the table and if you’d like to learn more about the other color systems, please click their respective links below:
CMYK Color System | RGB Color System | Pantone Matching System (PMS) | |
---|---|---|---|
Method | Blends four colors to create new colors | Arranges color pixels to create new colors | Uses pre-mixed solid, single-color ink |
Mediums | Printing | Digital screens | Printing |
When to Use | Designs that consist of multiple colors | Any digital designs | When perfect color matching is required |
Color Consistency | Difficult to match between print jobs | Colors will display differently between screens | Identical colors from print to print, but difficult between different mediums |
CMYK Color System
Recall earlier that we recommended converting projects from RGB to CMYK before printing. The purpose of the CMYK color model derives from the inefficient use of the RGB color model in printing. This is because CMYK is explicitly intended for ink, while RGB is for a digital display.
With RGB, inks of three colors (red, green, blue) would need to be mixed to get white, which is usually the most dominant color for a document containing text, for example. Paper is already a white variation, so using the RGB system is ineffective for the sheer amount of ink printed on white surfaces.
That’s why the CMY (Cyan, Magenta, Yellow) color system became the printing solution! Cyan and magenta yield blue, magenta and yellow yield red, while yellow and cyan yield green. All three colors combined will then make key, or black. This immensely reduces the ink needed to print a wide range of designs and colors.
As shown in the figure below, CMYK subtracts colors instead of adding colors like RGB, which makes this color system utilize way less ink!
Read more about color matching here!
So now that you know why the CMYK color system is better than RGB for printing, how do you convert an RGB project to CMYK?
While most colors can translate well between the color systems, subtle color shifts should be expected. What looks like blue in RGB might look like purple in the CMYK color space. This is why we highly recommend designing any work intended for print using CMYK beforehand.
However, if your project is already in RGB, then the simple steps below will help!
We always recommend viewing a printed proof of your project before sending it to the printing press to avoid costly errors and ensure accuracy.
With RGB now exclusively for digital screens and Pantone an expensive alternative, the CMYK color system has become a popular choice for packaging as it consumes less ink overall while providing an accurate color output.
For that reason, custom packaging is efficient with offset printing, flexo printing, and digital printing using the CMYK color system and creates consistent brand colors for exceptional branding opportunities.
Still trying to figure out if CMYK is suitable for your packaging project?
Contact us today and find the perfect color-matching system for your custom packaging project!
The post What is CMYK for Printing? first appeared on PakFactory Blog.
The post What is CMYK for Printing? appeared first on PakFactory Blog.
]]>The post What is Aqueous Coating for Printing and Packaging? first appeared on PakFactory Blog.
The post What is Aqueous Coating for Printing and Packaging? appeared first on PakFactory Blog.
]]>Source: PakFactory
Creating a lasting impression on your target market involves having attractive product packaging with a distinct “wow” factor. In that regard, the print coating is one of the most critical packaging elements you need to be aware of if you want your packaging to look its best despite multiple individuals touching and handling your products.
Whether used for packaging boxes, calendars, manuals, or other applications, the coating impacts the final look and appeal of the product.
And while each company has its own set of needs, to get you started, let’s look at one of the most popular coatings available: Aqueous (AQ) coating. But before we delve deeper into this excellent finishing method, you might wonder why you should apply a print coating to your project.
Regardless of which coating you’re considering, in most cases, it will help protect and enhance your final product. If you intend to mail your piece, a print coating is necessary. And if you predict many hands will handle your print like a business card or brochure, a print coating is highly recommended for its added protection.
Source: Unsplash
However, sometimes your printed piece might be hindered by a print coating. Greeting cards, for example, do not need a coat, as applying one would make writing on the card challenging, defeating the intended purpose of your greeting cards! Still, if you wish to add a print coating to these items, you must specify with your service provider the areas where a coat should not be applied to avoid this problem.
But now that you know when is a good time to use coatings, let’s get back to the main topic at hand.
Unlike UV coating and varnish, AQ coating is water-based and is known as the “default” coating for printing and packaging. It features fast-drying capabilities when used during the printing process, which makes it possible to achieve different appearances, allowing various application methods.
In addition to this versatility, AQ coating is known for being environmentally friendly with its non-toxic, water-based solvent that makes it perfect for applications such as:
Source: PakFactory
AQ coatings are also resistant to fingerprints and other impurities during handling, and it is also possible to enhance surface durability with a combination of different coat layers. However, the product type will largely determine the suitability of AQ coating for your packaging.
Remember that though this coating is water-based, it does not mean it is waterproof!
Cosmetic products and perfumes, for instance, contain chemicals that may make AQ coating challenging to maintain on the exterior or interior of the packaging due to the risk of leaking, so always consider the product and your needs when deciding on the best print coating for you.
To help you better determine this, we have included some key differences and features between the popular options of AQ coating, UV and varnish.
AQ Coating | UV Coating | Varnish | |
---|---|---|---|
Coating Area | Flood coating only | Flood or spot coating | Flood or spot coating |
Drying Speed | Fast drying | Instant drying | Longest drying time |
Solution Base | Non-toxic water based | Chemical based solvent | Water or chemical based solvent |
Yellowing | Less likely to yellow | Do not yellow | Yellowing may occur |
Finishing | Matte, satin, gloss | Matte, gloss | Matte, satin, gloss |
If the other options seem more appealing to your printing project needs, please visit our UV coating or varnish articles to learn more. If not, then let’s continue our journey into aqueous coatings!
We’ve briefly mentioned the benefits AQ coating has over the other popular finishing methods, but let’s look at the four main benefits in more detail to understand why so many companies choose this option.
As mentioned previously, aqueous coatings are available in matte, satin or gloss finishes, but other unique coating types are also available to fit your printing needs! Let’s have a look.
Gloss: A gloss aqueous coating is ideal if you’re looking for a less showy and more muted finish. As mentioned above, UV coating or film laminates are better options if you are looking for a flashier shine.
Dry erase: An alternative to laminate, dry-erase AQ coating achieves a high gloss effect at a low price.
Satin: With an appearance between gloss and matte, a satin aqueous coating offers medium shine and excellent scuff resistance.
Matte: A matte aqueous coating offers minimal shine and depth but a high degree of color intensity.
Soft Touch: Soft touch aqueous coating creates a velvety texture with a soft appearance compared to a glossy finish. Similar to matte coating, it gives a subtle finish with little to no shine.
Now that we know the different coating types of this popular print coating method, what is the application process?
Put simply, special machines apply the aqueous coating immediately before printing ink on the sheets. Special care is taken to ensure no wrap, wrinkles, or curls occur on the paper during this process and after the application of the coating, the sheet passes through a heated air system for quick drying.
The video below is a great visual example of how this process is done.
Although AQ coating provides several benefits, the chances of chemical burning with aqueous coating and UV coating are higher than other finishes such as varnish.
The solvent resistance of the aqueous coating is lower than that of UV coating and thermal lamination.
Nevertheless, AQ coating is still the most popular choice for print finish options thanks to its reliable and brilliant results.
Looking to learn more about your coating options for packaging?
Contact our product specialists today and get expert advice on finishing and printing options tailored to your product!
The post What is Aqueous Coating for Printing and Packaging? first appeared on PakFactory Blog.
The post What is Aqueous Coating for Printing and Packaging? appeared first on PakFactory Blog.
]]>The post What is Foil Stamping? first appeared on PakFactory Blog.
The post What is Foil Stamping? appeared first on PakFactory Blog.
]]>Foil stamping is a specialty printing process that uses metal dies, heat and pressure, to apply foil films.
Foil stamping has a wide range of applications, including;
Source: PakFactory
The modern technique, known as hot stamping, was first conceived in the late 19th century.
Today, it is leveraged to create visual interest and increase the perceived value of products.
A foil is a thin film coated with the colors that are applied to a product through a process known as hot stamping.
The pigment is placed on a clear film, which acts as a carrier that transfers the color onto the product.
Another layer of the foil consists of pigmented sediments, and a third layer is a heat-activated adhesive that sticks the sediments onto the product.
Like Embossing & Spot UV, you can apply foil stamping to all kinds of paper stocks.
It works best for stock with a smooth, even surface as opposed to textured or lined materials.
Based on your substrate and the type of finish you want, you can choose from one of the four hot stamping techniques discussed below:
Source: Sonhab Chocolate – PakFactory
Typically gold and silver coloring is used to create a luxurious effect.
Various finishes, such as glossy, matte, metallic, holographic sparkles and wood grains are available.
There are different types of foils that can help create distinctive packaging/products in line with your marketing campaign or brand image.
Metallic foil, which offers an attractive patina across colors like silver, gold, blue, copper, red, and green.
Matte pigment foil, which has a muted appearance but an intense depth of color.
Gloss pigment foil, which combined high gloss with a non-metallic finish across a variety of colors.
Holographic foil, which transfers hologram images for a futuristic, eye-catching look.
Special effects foil, which can be used to create a range of textures, including mimicking the appearance of leather, pearl, or marble.
Hot stamping is a machine-based process.
The foiling die on which your design is etched is heated and stamped with high pressure to bond a thin layer of foil to the substrate.
The application of heat and pressure is the core approach that delivers the desired result on the substrate.
The die can be made of brass, magnesium, or copper.
Though it is an expensive purchase, it offers multiple uses and is therefore worth the initial investment.
As foil stamping doesn’t use ink, the foil color is not impacted by the color of the substrate upon which the design is applied.
Foils in light and metallic colors can be easily used on darker colored papers.
You can achieve a range of finishes with hot stamping, allowing you to experiment with your branding and packaging.
The striking effect possible with this technique also makes it a good solution to stand out from the sea of competitor products.
For other print finishing options, you can check out: Embossing & Debossing, Spot UV, Window Patching & Soft Touch.
Foil stamping has great potential to elevate and breathe new life into existing packaging designs.
Whether it’s to add a little pizazz to your logo or enhance your artwork designs, foil stamping gives your products and brand a higher perceived value.
Working with a product specialist allows you to optimize your packaging in every aspect from structure to artwork.
The post What is Foil Stamping? first appeared on PakFactory Blog.
The post What is Foil Stamping? appeared first on PakFactory Blog.
]]>The post Folding Carton Box Packaging – The Master Guide first appeared on PakFactory Blog.
The post Folding Carton Box Packaging – The Master Guide appeared first on PakFactory Blog.
]]>Are you considering a folding carton for your product packaging? If you are, you’ve come to the right place to learn everything you need to know about this option! These foldable paper boxes are a trendy and versatile choice for many industries. Though these boxes are commonly seen as a paper packaging option for food, it is viable for pharmaceuticals, cosmetics, and electronics.
Source: HRBLS by Pharmakon Supernatural – PakFactory
The paperboard material is excellent for customizing your package’s size, shape and structure to accommodate any product.
So in this article, we will delve deep into what makes a folding carton tick starting with its definition, the common materials used, styles available, production method, and some pros and cons of this type of packaging. By the end of this master guide, we hope to have provided you with sufficient knowledge to decide whether this paper carton packaging option suits your product.
Before we take a closer look into this versatile packaging option, what exactly is it? Well, folding cartons are a type of paperboard packaging popular among consumer products for their low weight and versatility.
It is commonly used as secondary packaging, and as the name suggested, these foldable paper boxes are designed for easy assembly from a single flat sheet into a three-dimensional package, making them cost-effective to transport because they are shipped flat before being assembled while maintaining a high level of customizability.
But what are the differences between the similar and equally popular packaging options of rigid and corrugated boxes? To get a better understanding of the key differences between each option, we’ve provided a simple chart below:
Rigid Boxes | Folded Carton Boxes | Corrugated Boxes | |
---|---|---|---|
Set up | None if not foldable | Needed | Needed |
Sturdiness | High | Low | High |
Product Safety | High | High with the aid of inserts | High |
Cost | Generally High | Depends on printing & finish | Depends on printing & finish |
Appeal | Generally High | Depends on printing & finish | Depends on printing & finish |
Reusable | Yes | Usually not | Yes |
In terms of materials, the most common materials used for manufacturing standard folding cartons are paperboard made from wood pulp, a renewable and environmentally friendly resource. However, higher-grade, certified paperboard options that meet food and even medical standards are also available!
Alternatively, to increase eco-friendliness, kraft paperboard made from 100% post-consumer recycled material or reclaimed paper stock is also a popular option. And if you thought the material options offered a lot to consider, a wide selection of styles and different types of boxes are also available. In this master guide, we have provided you with the seven most popular options; let’s have a look!
The tuck end auto-lock bottom box, or crash bottom box, has a bottom design that automatically locks in place during assembly with a simple tuck flap. This box style is recommended for heavier products, like wine and beer, as it is the strongest among all paper box packaging options listed below.
Alternatively, the snap bottom or lock bottom box is another strong option suitable for heavier objects like wine or electronics. Also known as the 1-2-3 bottom box, this box style has flaps that push into each other and lock in place.
Straight tuck end boxes are stored flat and do not require additional assembly. They are identified by having both the top and bottom closures on the same side of the box and slits on the ends to keep the tucks locked. This style is ideal for light or medium-weight products like cosmetics or essential oils.
Reverse tuck end boxes are the same as straight tuck but have the end closures on the opposite sides of the box. Since they are nearly identical, reverse tuck boxes are also ideal for light or medium-weight products.
Paper sleeve packaging is a carton style designed to slip over another, typically undecorated box. This option is a very popular choice due to being the least expensive option and can instantly create fantastic customization for a plain box.
Double wall tray and lid boxes, or two-piece boxes are separated with a top and bottom half. The tray and lid fit snuggly together to create a sturdy double wall ideal for luxury products like jewelry and clothing or serve as food packaging for products like confectionery.
Customized folding carton boxes are the final popular option. Who said foldable cartons needed to be a certain way? Custom cutouts and inserts for the above options are limited only to the imagination. A well-placed cutout or insert can add a unique flare to your packaging, differentiating itself from competitors!
Whether using folding carton boxes as a paper food packaging solution or for other items like cosmetics and electronics, the styling options are limitless. From choosing kraft paper packaging for eco-friendliness or utilizing a two-piece box for added luxury, these foldable paper boxes are an excellent option for any product!
Regardless of the materials or style you choose for your carton packaging project, the process of making folding cartons remains the same. Once you’ve finalized your design choices for your box, it is time to let your packaging supplier get to work with the below list of elaborate processes known collectively as converting:
Now that we’ve gone over the intricate details of what makes a folding carton a popular and excellent choice for your packaging needs, what are the pros and cons of this option? Like the other popular options, there will always be benefits and downsides. Weighing these options is critical in deciding which packaging is best for you.
For starters, this packaging option can be cost-effective, sustainable and versatile. Carton boxes can come in many different shapes and sizes while being cheap to manufacture in large quantities. The materials used in this manufacturing process are also 100% recyclable, making them better for the environment.
Folding cartons also have a plethora of printing and unique finishing options available to choose from. As mentioned in this guide, printing options include offset, digital and flexographic printing, allowing excellent colors, unique textures and visual effects. For special finishes, this packaging option offers things such as:
Even options for certified grades of paperboard material are available to accommodate food and medical industry standards!
But though these many benefits are heavily in favor of folding cartons, there are still a few minor disadvantages compared to other options. The strength and durability, for example, can be a disadvantage, but foldable cartons can still be solid and reliable with additional inserts. However, compared to the more sturdy rigid and corrugated boxes, they may not be as protective of the product inside.
Additionally, due to the limitations of cutting machinery, thickness is limited to 0.81 mm, which makes it difficult for this packaging option to hold significantly weighty products.
And though we did mention that folding cartons are sustainable, on the other hand, some packages tend to be challenging to assemble and are often improperly thrown away after a single use, increasing waste and counterbalancing the fact that this option should be eco-friendly.
Overall, this packaging option is excellent for many products, but always consider the pros and cons to ensure this option is right for you. That being said, what industries are these foldable boxes best for?
Source: PakFactory
The food and medical industries are the first thing that comes to mind when considering the industry that best suits foldable cartons. We mentioned earlier that this packaging option offers different grades of paperboard suitable to specific industry standards, and this is where that advantage shines through.
To learn more about paperboard grades, click here!
But to briefly summarize, with more expensive and highly durable paperboard grades available, like Solid Bleached Sulfate (SBS) and Folding Box Board (FBB), it’s no question why medical and food companies prefer the folding carton. Options such as various paper grades help protect sensitive products from dust and damage while keeping the product fresh longer.
Source: PakFactory
Other industries that greatly benefit from foldable box cartons include the cosmetics industry for its lightweight and attractive packaging designs and the electronic industry for its ability to protect from physical damage, dust and moisture.
But though these industries benefit the most from this packaging option, that doesn’t mean folding cartons are unsuitable for other products outside these industries!
Need help finding the right custom packaging for your industry? Browse here!
Even if you have a product outside of the industries mentioned above, the folding carton can still offer great benefits for your product. If you are still unsure if this packaging option is right for you or if you are ready to take the next step in your packaging project journey, contact one of our packaging specialists for more information!
The post Folding Carton Box Packaging – The Master Guide first appeared on PakFactory Blog.
The post Folding Carton Box Packaging – The Master Guide appeared first on PakFactory Blog.
]]>